

Adam's painting project is finished.
It feels AMAZING.
Before I get into the tutorial and revealing the final result, I need to share some background information on why I chose to do a project for Adam. My husband is an incredibly talented man and is always working on perfecting his "craft." He is a motion graphics artist. Adam creates visual effects, motion graphics, and logo animations. He works not one job, but two--yes, my baby is something else! At his 9-to-5 job Adam is the Creative Director at Hello Studios here in Lynchburg. On the "side" Adam is the Site Editor for Aetuts+, one of the largest Adobe After Effects training sites in the world. Aetuts+ is part of a network of educational sites created by Envato, an Australia-based company. Their mission is to help people earn money by selling digital goods and grow in their fields by learning new skills. (Yes, he walked me through that word for word)
Pictured below are the logos for each of the different tuts+ sites:
Pictured below are the logos for each of the different tuts+ sites:

I wanted to create these logos for Adam to display in his studio office. I easily could have printed these out and framed them..but where is the fun in that? I decided to familiarize myself with my set of paint brushes and practice painting. Let me state one fact: "I, Katie Miller, am NOT painter." I enjoy painting and the idea of painting but have never been a painter. Drawing has been more my "thing." So this project is for all of you non-painters out there.
Here is a shot of my finished paintings:

Materials needed to create Logo Paintings:
- Canvases (Michaels has a package of 10 canvases for $19.99--that is $2
per canvas PLUS you can use a past receipt from their store for an extra
40% off--talk about a great deal!)
- Acrylic Paint (To complete Adam's project, I needed many ounces of
numerous shades. Michaels had a sale for 8oz Acrylic paint for $1.99! I
lucked out as an 8oz bottle is originally $3.50)
- Paint brushes: one thin, angled brush and one thick brush
- Paper plates - Paint brushes: one thin, angled brush and one thick brush
- Pencil
- Sharpie fine tip marker
- Projector
- Ruler (I used an old laundry card from college since I had to draw many
small straight edges)

This entire project cost me under $40.00! Keep in mind I completed not one, but ten canvases for Adam's studio office.
Making Your Logo Paintings
1. Download a logo of your choice onto your desktop or laptop.
2. If you have access to a projector, connect the projector up to your
computer and project your logo of choice onto a wall.

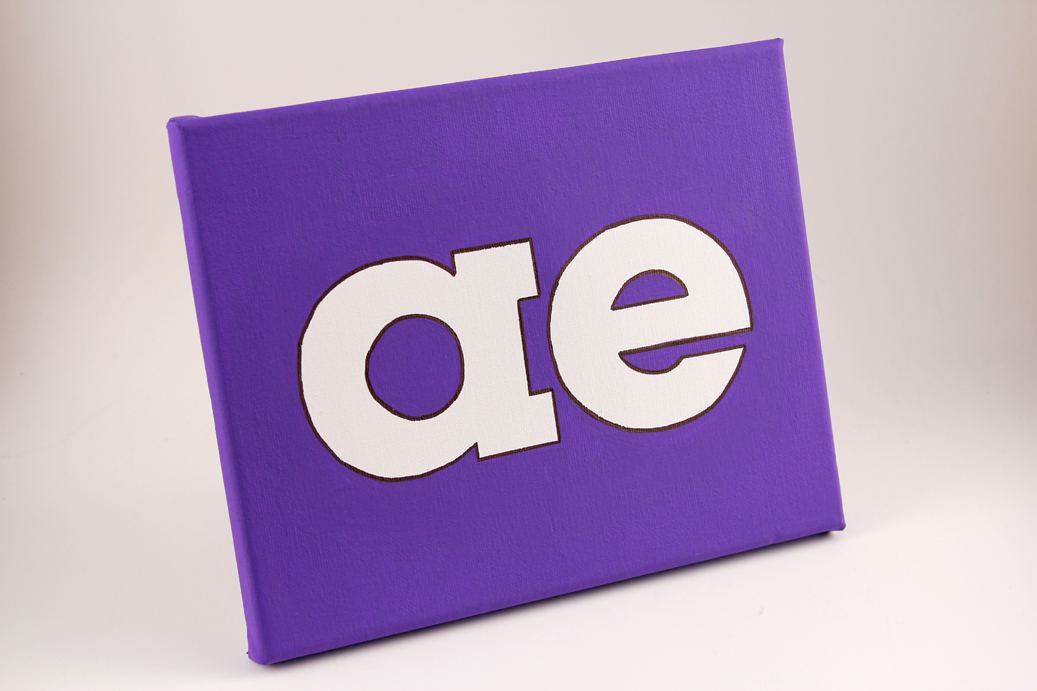
3. Once your image is projected, grab your blank canvas and hold it against the
wall until you are satisfied with the sizing of the logo on your canvas. The
pictures above and below captured me lining up "ae" with my canvas. My goal
was to have "ae" as large as it could be with fitting perfectly on my canvas.
Adam's projector was situated on the chair a few feet away from the wall in
his office.


4. When your canvas is in place, using your pencil, carefully trace the
logo.
Hint: Take your time as you trace. I learned this is
the most important step. If you have a spouse,
child, or friend nearby have them hold your canvas
in place while you trace. Feel free to even use a
ruler or another straight edge to help with your
lines. I did this by myself and rushed the process
thinking I could "fix" my lines later on. To my
surprise, I relied on the exact pencil lines I drew
during this step. Take your time!


5. Depending on how many canvases you plan on painting, repeat steps #1-4
until you have completed tracing all logos on your canvases.
6. Set your traced canvases aside and set up your painting station. Your station
should include a paper plate with your choice of paint color on it and paint
brushes (one thin and angled, one thicker).
7. Begin using your thin, angled brush to outline your pencil lines with paint.
Hint: Use very small amounts of paint on your brush
during this step and take your time. You can
practice "getting to know your paint brush" on your
paper plate. Try and get a feel for the different
angles the bristles make and how to use this to
your benefit.
After completing one coat of paint, painting only around the outline of your
pencil lines, your canvas will look like this:

8. Wait as long as it takes for your canvas to dry. This project will definitely
teach patience :)
teach patience :)
9. Continue the method you used in step #7 to paint a second coat. Pictured
below is the beginning of painting my second coat. (Yes, I am a certified
Elementary school teacher even though I hold my pen and paint brush in a
horrid, horrid way)
Elementary school teacher even though I hold my pen and paint brush in a
horrid, horrid way)
Hint: Please notice the way the bristles are hugging
the pencil line. Be confident in your brush and trust
the way it moves.

10. Allow time for your second coat to dry.
11. When it is dry, using your thicker bristled brush, paint a light first coat on the
remaining canvas including all sides.
12. Wait for the paint to dry and repeat for a second coat including all sides.
Hint: The lighter, warmer colors only require 2
coats while the darker, cooler colors required up to
4. The purples were the hardest to cover up the
white canvas.
13. When your canvas is completely painted (as many coats as it took you) it will
look like this:

you. Take your Sharpie fine tip marker as well as your ruler (or old hotel key,
gift card, old laundry card, etc.) and begin outlining your logo. By using a
ruler or old card, it will allow you to trace your logo with your Sharpie and
create straight lines.
Hint: This is the step I "fixed" my not-so-straight
lines I drew during step #4. I made sure my
laundry card was aligned with the rest of my
canvas before tracing it with the Sharpie. You can
press harder on your Sharpie to create a thicker
line which is great for fixing your lines. Pressing
lighter on your Sharpie will create thinner lines.
press harder on your Sharpie to create a thicker
line which is great for fixing your lines. Pressing
lighter on your Sharpie will create thinner lines.

15. Using your Sharpie, continue tracing the curved edges. You cannot use
anything as a guideline so remember to take your time. If it is not perfect,
that is okay! Your final logo painting will look something like this:

16. Hang up your hard work and enjoy your painting--YES!--you completed a
canvas painting! Now show it off :)


Thank you for taking the time to read this tutorial. I really wanted to share this painting project with you because the result is clean, fresh, modern, and very attainable! I think these would look darling in a little boy or girls room using their initials..or is a kitchen reading "eat"..get creative everyone! Where would you use a craft like this in your home? Stay tuned for a similar painting project, one that does not require using a projector, just a simply pattern made of cardstock:) I hope you will all come back and visit me at Little Things Bring Smiles.
Happy Living--Happy Crafting
and remember
--Little Things Bring Smiles--
This deserves a pin ! It's outstanding...
ReplyDeletehubby must have loved it !
Hope you have a beautiful and blessed Easter Katie...luv ya bunches..xo
Lucy
These look GREAT! You have some patience with a paintbrush because those lines are all meticulously good. :) Adam's office looks complete!
ReplyDeleteHI!! I am new here, and I am already pretty much in love with your cute little blog! I love this tutorial...what an awesome idea!
ReplyDeleteI hope you don't mind if I stick around awhile! :)
HAPPY Easter! ;)
Katie! This looks great. I can only imagine how time consuming this was. I even love the way it was hung on the wall haha.
ReplyDeleteThis makes me want to paint with all the colours of the rainbow! What an amazing display, you did a great job!
ReplyDeleteI had to laugh when you suggested a kids room, because I had just been thinking that it would be really fun to do my kids names, or initials or something. It also just occurred to me that I could do their birth dates too! OOhh, my wheels are spinning! I love to paint, but I need easy projects and this looks like just the thing. Now, to find some paint and canvas....
ReplyDeleteThis looks awesome, such a nice thing to do for your hubby.
ReplyDeleteReally cute and fun! Great graphic 'design.' That must have taken forever too! Stopping in from I heart Naptime!
ReplyDeletegrazie è molto bello e anche se non ho il proiettore le ricalco con la carta carbone grazie ciao dall'Italia eleonora
ReplyDeleteGreat color choices!
ReplyDeleteThank you for this post. i think i could do this project!
ReplyDeleteOh, wow! I am very impressed. Those look professionally done. :)
ReplyDeleteThanks for joining my Weekend Bloggy Reading party. Hope you had a lovely Easter! :)
so romantic!
ReplyDeletevisiting via CRAFT. Gotta love the 10 pack of canvases at Michael's! I pretty much always have some on-hand now. I love how you used the projector to trace the image.
ReplyDeleteThis is such a great gift idea. And how awesome is it that you can get a 10 pack of canvases. I also love the idea of using a projector to stencil.
ReplyDeleteLOVE this, and your blog! so Lovely! Thank you for the sweetest comment that made my day! And for introducing me to your wonderful blog!
ReplyDeletexx
Misty
I think this turned out wonderful! I really like how all the canvases are arranged. Such a great tutorial!
ReplyDeleteLOVE it! So creative! Thanks for linking up AND following!
ReplyDeleteSmiles,
Melanie
Reasons To Skip The Housework
Tuesday Time Out Link Up Party
Link up Your Weekly Parties Here
oh, this is amazing! go Katie! I don't think I would have enough patience for this!
ReplyDeleteThat is beautiful! I wanted to know if you rented a projector and if yes, which model and where?
ReplyDeleteThese look awesome! What a fun, modern, personal way to decorate your hubby's space! Bet he loves it!
ReplyDeleteAmy
http://oneartmama.blogspot.com
These are terrific, and you have posted a GREAT tutorial. Excellent tips about the coats of paint and the brush control!!!
ReplyDeleteLove this art!! Great tutorial! :)
ReplyDeleteYou did a great job with these. It's hard to find hubby type decorations.
ReplyDeletei'm in love!! totally pinned it :)
ReplyDeleteI LOOOOOOOVE this! Awesome!
ReplyDeleteI would LOVE to have you link up to my Whassup Wednesday Par-Tay! And I have a party button you can grab and put on your blog so your friends can come too:)
If you are NOT already a Follower of Elements Interiors....HELLEEERRRR!
Click that Google Follow button and YOU will be ENTERED in my
"Its a SURPRISE!" GIVEAWAY to be announced EVERY MONDAY! Yeppers! You read it right,
a Winner EVERY MONDAY!!! With GREAT Goodies you wont want to miss!!
Hope to see ya at Whassup Wednesday!!!
*ENTER LINKY PAR-TAY Here! *
xoxokara
This is seriously amazing!!!
ReplyDeleteI still don't get it, but they look totally awesome none the less!
ReplyDeleteWow, those look amazing! Great tutorial.
ReplyDeleteWow! Those look fantastic!! And you have some mad sharpie skills - my line would wobble all over the place! Thanks for sharing! I'm your newest follower :)
ReplyDeleteas a graphic designer i can totally appreciate this! what a neat idea! thanks for sharing. Here from Somewhat Simple!
ReplyDeleteThose look great! I have to admit, I really kind of liked the 'scrubby' look of the canvas in that picture where you put the first coat of purple paint only around the letters. I like that 'messy' look, but I guess a whole wall of messy wouldn't have looked so good! Anyway, they look amazing and your husband must love them! thanks for sharing :-)
ReplyDelete~Laura
hayestone.blogspot.com
Thanks for coming over to link this up to our Wicked Awesome Wednesday party.
ReplyDeleteLove this!! Great work. Love the colors.
ReplyDeleteKim :)
ohidid.blogspot.com
what a cool project! i'm thinking there are so many ways i could apply this to canvas or even fabric...thanks for sharing this idea at fridays unfolded!
ReplyDeletealison
stuff and nonsense
Katie, Thank you so much for your super sweet comments on my blog and becoming a new follower! I'm definitely following back and can't see what you'll come up with next.. I love this project! Great job! :)
ReplyDeleteI hope you'll stop by to link up at my linky party tomorrow. I would love to see you there!
xoxo from Germany,
Vanessa @ {nifty thrifty things}
PS: You are a "no-reply-blogger".. :( I would have loved to send an email, but couldn't reply to your comment.
I love how this looks and the rainbow colors are beautiful! so great.
ReplyDeleteI'm a new follower!
kathryn @ thedragonsfairytail.blogspot.com
love the font, colors, arrangement & END result! =)
ReplyDeletethis look awesome! and great pics too, do you have a photo box??
ReplyDeleteGreat tips on using the projector and the sharpie for outlining...
ReplyDeleteThanks for linking up to Creative Juice Thursday. Hope to see you back again with new ideas this week...
Such a great idea! Your husband must love these!
ReplyDeleteThank you so much again for linking this up to {nifty thrifty sunday}!
ReplyDeleteI hope to see you again this week! :)
xoxo,
Vanessa @ {nifty thrifty things}
That is lovely, it is tempting to do something like that for my gamer husband.
ReplyDeleteThank you for the inspiration
Now this is cool! How creative! Great job Katie, I am sure Adam was stoked on this!
ReplyDeleteThat is so neat! This would go great in our new office space.
ReplyDeleteGreat project! So neat and perfect.. I would like to share this project of yours with my readers and provide backlinks to your blog so they may come and see your other amazing projects.. Write to me at craftionary@gmail.com so we can discuss furthur and schedule a day..
ReplyDeleteThanks
Hani
www.craftionary.blogspot.com
ou did a great job with these. It's hard to find hubby type decorations.
ReplyDeletei am loving it
ReplyDeleteSuch a great idea! I think I'll do this with the Adobe Suite and FCP for my office! :D
ReplyDeleteahha Such an Awesome idea ;) i will also try to do this but i have lack of projector but i have bussiness about Jobs in India and Pakistan
ReplyDeleteWOW!!! those look amazing I might do some they have inspierd me.I love them.
ReplyDeleteAWESOME! AWESOME! AWESOME!
ReplyDeleteIt's so refreshing to see things being made by hand and not digitally for a change!
Great job with the canvas' and for writing such a great tutorial!
Thank you for sharing this information. The information was very helpful and saved a lot of my time.
ReplyDeletepainters
cheap ugg sale
ReplyDeletenmd adidas
moncler outlet
uggs outlet
rolex watches
cheap jerseys
uggs outlet
oakley sunglasses wholesale
canada goose parka
canada goose outlet
adidas nmd
gucci borse
uggs outlet
stephen curry shoes
coach factory outlet
polo ralph lauren outlet
reebok outlet
coach factory outlet online
birkenstock outlet
yeezy boost 350
converse shoes
coach outlet online
versace sunglasses
polo ralph lauren outlet online
coach outlet online
coach outlet online
ugg australia boots
ugg boots
nike free flyknit 5.0
michael kors outlet online
north face outlet
oakley sunglasses outlet
nike air max 90
canada goose jackets
ugg boots outlet
ugg boots outlet
cheap nfl jerseys
ugg boots outlet
201691yuanyuan
クロムハーツ
ReplyDeletecoach factory outlet
louboutin shoes
kate spade outlet
ralph lauren outlet
air huarache
ralph lauren outlet
dolphins jerseys
michael kors outlet
soccer boots
michael kors outlet
ReplyDeleteralph lauren uk
prada shoes
asics shoes
skechers shoes
kate spade outlet
canada goose
salomon shoes
fitflops clearance
christian louboutin shoes
air jordan
ReplyDeletered bottom shoes
vans outlet
curry 6
jordans
longchamp handbags
off white clothing
ysl handbags
yeezy boost
yeezy boost 350
vans
ReplyDeletekyrie 6
golden goose
michael kors handbags
coach outlet
nike air vapormax
adidas yeezy
adidas tubular
goyard wallet
cheap jordans
Low cost Newport Cartons
ReplyDeleteThe Sydney Sixers include signed England pacer Tom Curran into a one-year deal with the upcoming Big Attack League Cheap Marlboro 100'S Cigarettes Online. The 23-year-old has become added to this Sixers squad Marlboro Cigarettes Size, soon after John Hastings seemed to be forced to begin living prematurely due some sort of health concern.
Curran made his or her Test debut in Australia over the 2017-18 Ashes line and took career-best One-Day Overseas figures of 5 intended for 35 in Perth right at the end of the expedition.
Curran will subscribe to fellow Englishman Joe Denly for the Sixers and appears to be set to play a vital role in along side it given the relative inexperience on the Sixers' fast-bowling brigade.
Quarterly report Sixers squad: Moises Henriques (c) Cheap Cigarettes Nearby Cheap Carton Of Newport Cigarettes, Sean Abbott, Java Denly (England), Mickey Edwards, Mary Dwarshuis, Daniel Hughes, Nathan Lyon, Chris Nevill, Stephen O'Keefe, Josh Philippe, Lloyd Pope, Nike jordans Silk, Henry Thornton, Jeff Curran (England), Justin Avendano, Serta Fallins.
yeezy gap
ReplyDeletepg shoes
fear of god t shirt
hermes outlet
bape shirt
palm angels hoodie
a bathing ape
bape clothing outlet
kevin durant shoes
yeezy gap
I have read this article; it is very in보성출장샵formative and helpful for me
ReplyDeletegolden goose sale
ReplyDeletegolden goose
goyard
chrome hearts
golden goose outlet
kyrie irving shoes
off white hoodie
kyrie 6
golden goose outlet
kevin durant shoes
Your painting tips are fantastic! The simple techniques you’ve shared make it easy to achieve beautiful results. I’m inspired to try these methods in my own projects. Thanks for the helpful post!
ReplyDeleteWholesale Party Dresses
Cool steps
ReplyDeleteشركة كشف التماس الكهرباء بالرياض VL7sni3OAd
ReplyDeleteجهاز كشف اعطال الكهرباء بالرياض r0uvh7fT8P
ReplyDeleteشركة تأسيس وتركيب كهرباء بالرياض
ReplyDelete3Zmz5eYQDK
Discover beautiful Canvas Painting collections at Vibecrafts, perfect for adding life to any space. From modern designs to traditional art, our premium quality canvas paintings make home decor easy, stylish, and affordable. Explore more at Vibecrafts today.
ReplyDeleteWall painting can instantly elevate any room’s look. I recently explored Vibecrafts and was impressed by their wide range of stylish and affordable Wall painting options. Perfect for anyone looking to refresh their space with art that fits modern Indian homes. Highly recommend checking them out for quality and design.
ReplyDeletertyv83dg3
ReplyDeletegolden goose outlet
golden goose outlet
golden goose outlet
golden goose outlet
golden goose outlet
golden goose outlet
golden goose outlet
supreme outlet
golden goose outlet
golden goose outlet
ReplyDelete순천 출장마사지 서비스를 담당하는 모든 관리사는 체계적인 교육과 실무 경험을 갖춘 전문 테라피스트로 구성되어 있습니다.
고객 한 분 한 분의 컨디션과 니즈를 정확하게 파악하여 맞춤형 케어를 제공하며, 피로 회복, 근육 이완, 스트레스 완화에 최적화된 프로그램을 진행합니다.나주출장마사지
목포출장마사지
순천출장마사지
함평출장마사지
순천출장만남, 순천 홈케어 서비스를 찾는 고객분들께 보다 높은 만족도를 제공하기 위해 철저한 관리사 선발 기준과 지속적인 서비스 교육을 운영하고 있습니다.
또한 위생 관리와 서비스 매너를 최우선으로 하여 처음 이용하시는 고객도 안심하고 이용할 수 있도록 준비되어 있습니다.