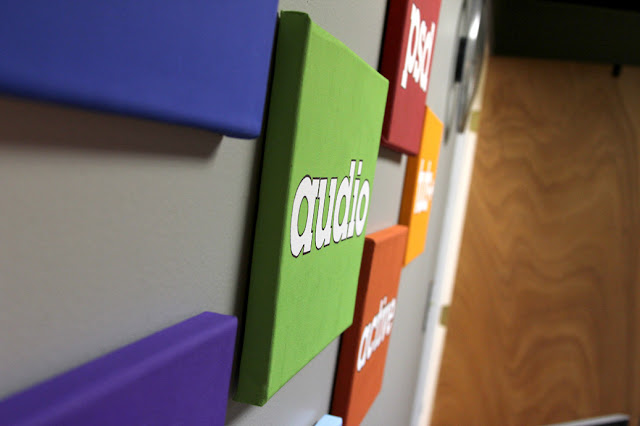
Adam's painting project is finished.
It feels AMAZING.
Before I get into the tutorial and revealing the final result, I need to share some background information on why I chose to do a project for Adam. My husband is an incredibly talented man and is always working on perfecting his "craft." He is a motion graphics artist. Adam creates visual effects, motion graphics, and logo animations. He works not one job, but two--yes, my baby is something else! At his 9-to-5 job Adam is the Creative Director at Hello Studios here in Lynchburg. On the "side" Adam is the Site Editor for Aetuts+, one of the largest Adobe After Effects training sites in the world. Aetuts+ is part of a network of educational sites created by Envato, an Australia-based company. Their mission is to help people earn money by selling digital goods and grow in their fields by learning new skills. (Yes, he walked me through that word for word)
Pictured below are the logos for each of the different tuts+ sites:

I wanted to create these logos for Adam to display in his studio office. I easily could have printed these out and framed them..but where is the fun in that? I decided to familiarize myself with my set of paint brushes and practice painting. Let me state one fact: "I, Katie Miller, am NOT painter." I enjoy painting and the idea of painting but have never been a painter. Drawing has been more my "thing." So this project is for all of you non-painters out there.
Here is a shot of my finished paintings:
Materials needed to create Logo Paintings:
- Canvases (Michaels has a package of 10 canvases for $19.99--that is $2
per canvas PLUS you can use a past receipt from their store for an extra
40% off--talk about a great deal!)
- Acrylic Paint (To complete Adam's project, I needed many ounces of
numerous shades. Michaels had a sale for 8oz Acrylic paint for $1.99! I
lucked out as an 8oz bottle is originally $3.50)
- Paint brushes: one thin, angled brush and one thick brush
- Paper plates
- Pencil
- Sharpie fine tip marker
- Projector
- Ruler (I used an old laundry card from college since I had to draw many
small straight edges)
This entire project cost me under $40.00! Keep in mind I completed not one, but ten canvases for Adam's studio office.
Making Your Logo Paintings
1. Download a logo of your choice onto your desktop or laptop.
2. If you have access to a projector, connect the projector up to your
computer and project your logo of choice onto a wall.
3. Once your image is projected, grab your blank canvas and hold it against the
wall until you are satisfied with the sizing of the logo on your canvas. The
pictures above and below captured me lining up "ae" with my canvas. My goal
was to have "ae" as large as it could be with fitting perfectly on my canvas.
Adam's projector was situated on the chair a few feet away from the wall in
his office.
Our friend, the projector. You do not need a projector that looks just like this one--have any teacher friends? I'm sure by asking around you can find one in a school, I know they still "exist" because I used them 2 years ago during my student teaching! Your church may have access to one as well, just ask around :)
4. When your canvas is in place, using your pencil, carefully trace the
logo.
Hint: Take your time as you trace. I learned this is
the most important step. If you have a spouse,
child, or friend nearby have them hold your canvas
in place while you trace. Feel free to even use a
ruler or another straight edge to help with your
lines. I did this by myself and rushed the process
thinking I could "fix" my lines later on. To my
surprise, I relied on the exact pencil lines I drew
during this step. Take your time!
Canvas before and after tracing the logo. Please note the not-so-straight lines.
5. Depending on how many canvases you plan on painting, repeat steps #1-4
until you have completed tracing all logos on your canvases.
6. Set your traced canvases aside and set up your painting station. Your station
should include a paper plate with your choice of paint color on it and paint
brushes (one thin and angled, one thicker).
7. Begin using your thin, angled brush to outline your pencil lines with paint.
Hint: Use very small amounts of paint on your brush
during this step and take your time. You can
practice "getting to know your paint brush" on your
paper plate. Try and get a feel for the different
angles the bristles make and how to use this to
your benefit.
After completing one coat of paint, painting only around the outline of your
pencil lines, your canvas will look like this:
8. Wait as long as it takes for your canvas to dry. This project will definitely
teach patience :)
9. Continue the method you used in step #7 to paint a second coat. Pictured
below is the beginning of painting my second coat. (Yes, I am a certified
Elementary school teacher even though I hold my pen and paint brush in a
horrid, horrid way)
Hint: Please notice the way the bristles are hugging
the pencil line. Be confident in your brush and trust
the way it moves.
10. Allow time for your second coat to dry.
11. When it is dry, using your thicker bristled brush, paint a light first coat on the
remaining canvas including all sides.
12. Wait for the paint to dry and repeat for a second coat including all sides.
Hint: The lighter, warmer colors only require 2
coats while the darker, cooler colors required up to
4. The purples were the hardest to cover up the
white canvas.
13. When your canvas is completely painted (as many coats as it took you) it will
look like this:
14. The edges will appear rather rough and will be needing some extra love from
you. Take your Sharpie fine tip marker as well as your ruler (or old hotel key,
gift card, old laundry card, etc.) and begin outlining your logo. By using a
ruler or old card, it will allow you to trace your logo with your Sharpie and
create straight lines.
Hint: This is the step I "fixed" my not-so-straight
lines I drew during step #4. I made sure my
laundry card was aligned with the rest of my
canvas before tracing it with the Sharpie. You can
press harder on your Sharpie to create a thicker
line which is great for fixing your lines. Pressing
lighter on your Sharpie will create thinner lines.
15. Using your Sharpie, continue tracing the curved edges. You cannot use
anything as a guideline so remember to take your time. If it is not perfect,
that is okay! Your final logo painting will look something like this:
16. Hang up your hard work and enjoy your painting--YES!--you completed a
canvas painting! Now show it off :)
Thank you for taking the time to read this tutorial. I really wanted to share this painting project with you because the result is clean, fresh, modern, and very attainable! I think these would look darling in a little boy or girls room using their initials..or is a kitchen reading "eat"..get creative everyone! Where would you use a craft like this in your home? Stay tuned for a similar painting project, one that does not require using a projector, just a simply pattern made of cardstock:) I hope you will all come back and visit me at Little Things Bring Smiles.
Happy Living--Happy Crafting
and remember
--Little Things Bring Smiles--


