In my spare time I find myself on a particular website just ready for my inspiration light bulb to turn on.
Any guesses what that website may be? ;)
Back in April I spotted a pin and I had exactly two thoughts:
1. AMAZING, will definitely be making this!
and
2. DANGIT, why couldn't I have thought of this genius idea!
I have been in a bit of a creative rut lately. It's getting rather difficult to think of something completely new and original in the blogging world and the crazy awesome filled world of Pinterest. I have honestly sat just thinking of things to make, different techniques to play with and nothing--absolutely nothing!
When this happens I simply decide to try my own hand at someone else's craft because "imitation is the best form of flattery." --Truly it is my way of saying thank you to the crafter who came up with the idea and to express how much I adore their project--so much so I needed to have it in my home! So here it goes:
Here are my Plastic Spoon Mirrors:
Materials needed:
- Large Cardboard box
- Hot Glue Gun
- Hot Glue Sticks
- 5 Sawtooth hooks
- 5 Nails
- Hammer
- Ruler
- Scissors
- Pen or Pencil
- Duct Tape
- String
- 1 Can of Spray Primer
- 4 Cans Spray Paint
- 3 Mirrors: 2 10in Round Mirror, 1 12in Square Mirror
- 1 Rough Piece of Sandpaper and 1 Fine Piece of Sandpaper
- Optional: 4 Command Strips
and of course
- Plastic Spoons: 14 bags of 48 count $1.00 each
The entire project cost me around $50.00--I think that's pretty good for a set of 3 mirrors!
Making your Plastic Spoon Mirror:
1. Check your home for any materials you may already own. Then gather the rest of your supplies during one shopping trip to save yourself from having to run back and forth for more. (I took a few different trips...)
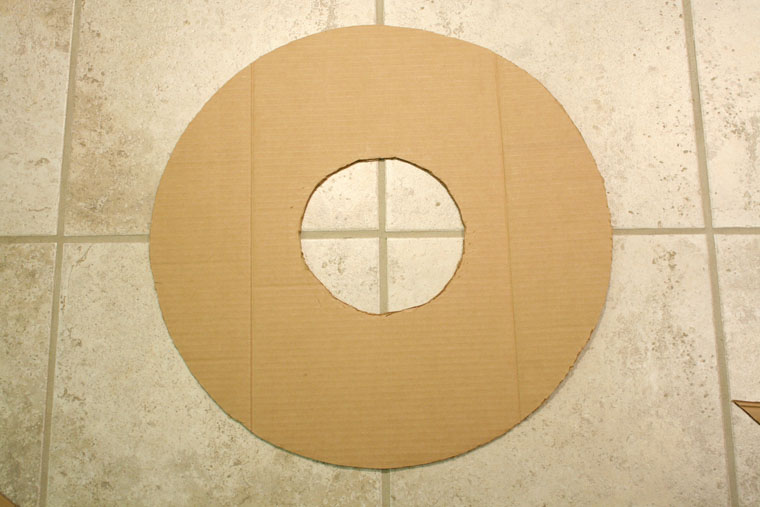
2. Cut your cardboard box so it lays flat on the ground or table.
3. Decide the diameter for your mirror using a ruler or yard stick. (I made one large, 22 inches, and two small, 13 inches.)
4. Cut a piece of string and tie one end onto the tip of your pen. Measure the string to the radius you desire and then tie the other end to your scissor.
5. Using your pen, string, and scissor you have created a drawing compass. Hold your scissor point firmly on your cardboard box and draw your circle.
Hint: Keep your pen and scissor pointing straight up and draw slowly. Also remember to keep the string taut as you are working your way around. You may even have a roommate or spouse hold your scissor in place.
6. Once your circle is drawn, simply cut it out.
Hint: If you do not own scissors sharp enough, try using a pocket knife or an x-acto blade.
7. Repeat steps 3-6 for your inner circle.
Hint: If you are creating a 22 inch large circle, draw a 12 inch inner circle, no smaller. (I made the mistake of drawing a smaller inner circle and had to change my plan once the spoons were glued. Will explain more later with photos.)
8. Using your duct tape, tape along any creases on both sides of your cardboard to add stability.
Hint: To create clean, smooth edges on your cardboard, tape around the perimeter of your outer circle and inner circle. I did not do this with my large mirror but with my two smaller mirrors and the smaller ones look polished and complete.
10. Cut the ends off of your plastic spoons.
Hint: Shop around for the most inexpensive spoons you can find--the "heavy duty" are impossible to cut through! I found bags of 48 spoons at Family Dollar for a $1.00 each.
11. Begin gluing your spoons onto your cardboard.
Hint: Practice spacing them out in alternating patterns first.
12. After 8 rows on your 22 inch cardboard circle, your spoons will appear to have run out of room.
Hint: This is what I was referring to earlier. I still had more room for spoons before reaching my inner circle but my spoons began to overlap each other and I did not like that.
So I cut my inner circle to make a larger, 12 inch circle leaving just enough room for one final row of spoons.
13. For your final inner row of spoons, cut the ends to form a nice oval shape because you will see the bottoms.
14. Use your rough sandpaper first to sand down your inner row spoons and then the finer sandpaper to smooth out your spoons. This step will take the longest but is worth the effort.
15. Glue your inner row of spoons slightly overlapping each other.
Hint: Take your time and you will be able to line them up just right!
For your two smaller mirrors, you will not run into the spoon spacing problem as I did with my 22 inch one and you will complete it so much faster! I highly suggest completing your large one first :)
16. Spend 5-10 minutes removing all of your glue gun "hairs".
Hint: Repeat this step after priming your work, the "hairs" will pop up all over!
17. Take your plastic spoon circle outside and spray with a primer made to cover plastic.
18. Once your primer is dry, spray paint the color of your choice!
(I used: Rust-Oleum Painter's Touch Multi-Purpose Spray Paint, High Gloss, Apple Red)
Hint: Double check to make sure your spray paint is meant for plastic! This spoon mirror will test your patience. It takes many many light coats to cover every nook and cranny but it's fun and shows instant results!
19. When your spoons are painted and dried, bring them inside to glue your mirrors to them.
Hint: Because of weight purposes, lay your mirror front facing you on your table. Place hot glue along the perimeter of your mirror and then place your cardboard spoon circle on top of mirror. Press firmly (and carefully) with your fingers and let sit.
20. When your mirror is in place, tape a few sections of the mirror onto the cardboard for extra security.
21. Hot glue your sawtooth hook to the back of your cardboard mirror. Again, let sit.
Hint: For my large 22 inch mirror, I used 3 sawtooth hooks and only 1 each for my smaller mirrors.
22. When everything is dry and to your liking, hang and enjoy!
Hint: I reinforced the large mirror to the wall with four command strips along with the three sawtooth hooks and nails to guarantee it would stay in place. The smaller mirrors are extremely light and did not need more help. So far so good friends!
Take a look:
Final Measurements:
My large mirror with spoons attached is 25 inches across.
My smaller mirrors with spoons attached are 16 inches across.
This project was truly fun to make and surprisingly did not take a lot of time. I suggest breaking it up into 4 days to avoid getting overwhelmed and tired of it. (I know how that happens with some projects..like this
one!)
Day 1: Cut your spoons and make your cardboard circles.
Day 2: Hot glue your spoons.
Day 3: Prime and Paint.
Day 4: Attach mirrors and hooks and hang!
I know I wrote out many steps for you--some are no brainers while others have a few helpful tips. I hope you found this tutorial and project inspirational! I know I sure did thanks to Kristi's
tute.
Happy Living--Happy Crafting
and remember
--Little Things Bring Smiles--


